
We all know what happens when Amazon suspends an account, but what happens when it’s the Amazon seller who wants to close shop? For those of you who’ve decided to throw in the proverbial towel or just take a breather from an Amazon seller account, we’ve put together a list of options.
Read our step-by-step instructions to get started tweaking your listings or closing down your Amazon business.
Before you close the books on Amazon, check to see if any of the alternatives below are more appropriate. We can think of no less than three: closing listings temporarily, setting your account to vacation mode, or permanently deleting some listings. In a nutshell, here are your options:
A. Switch to Vacation Mode
If you can tend to a couple of emails every now and then, when you’re on the go, but don’t have time to fulfill any new orders, this is probably your best choice.
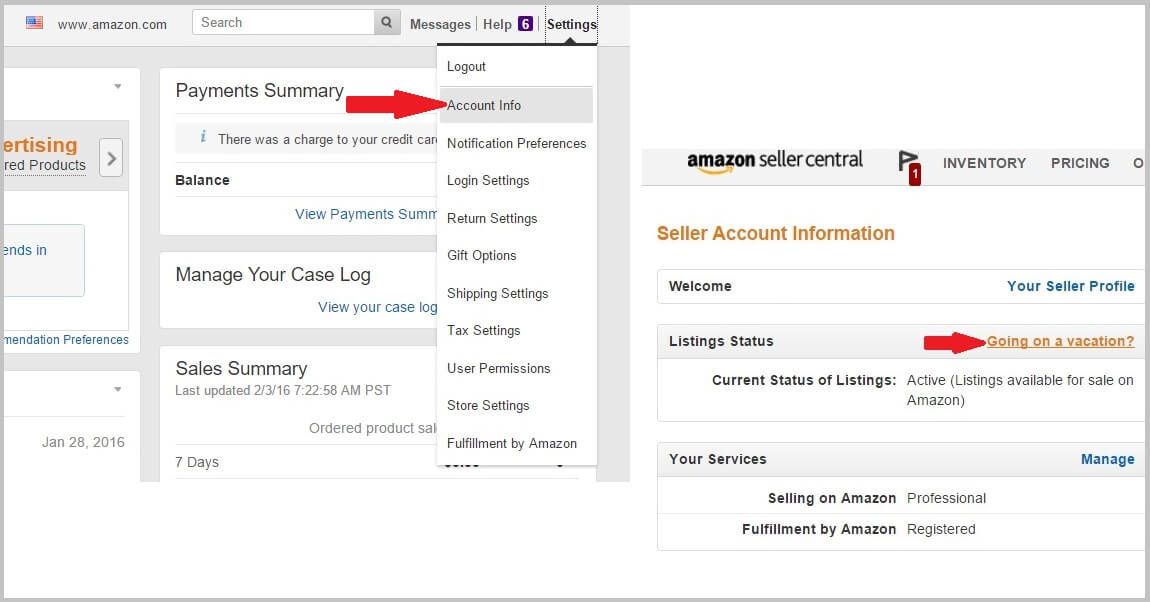
To set vacation mode:
1. In Seller Central, navigate to: Settings > Account Info.
2. Under Vacation Settings, select Inactive and click Submit.
Deactivating your listings is temporary and reversible. While away, you will still be receiving customer emails, and you will still be expected to look after your performance metrics. Set your account status back to Active whenever you want to make your listings public again.
B. Close Your Amazon Listings
Suppose you can’t fulfill any more orders because the manufacturer suspends production indefinitely, or you’re running a thorough quality check on all your inventory. If you’d like to keep your options open in case you find a new supplier for your products or international requirements and quality standards change, then this would be the option for you.
To close your listings:
- Access your Inventory in Seller Central.
- Check the items you’d like to stop listing.
- Select ‘Close Listings’ from the drop-down ‘Action’ menu above.
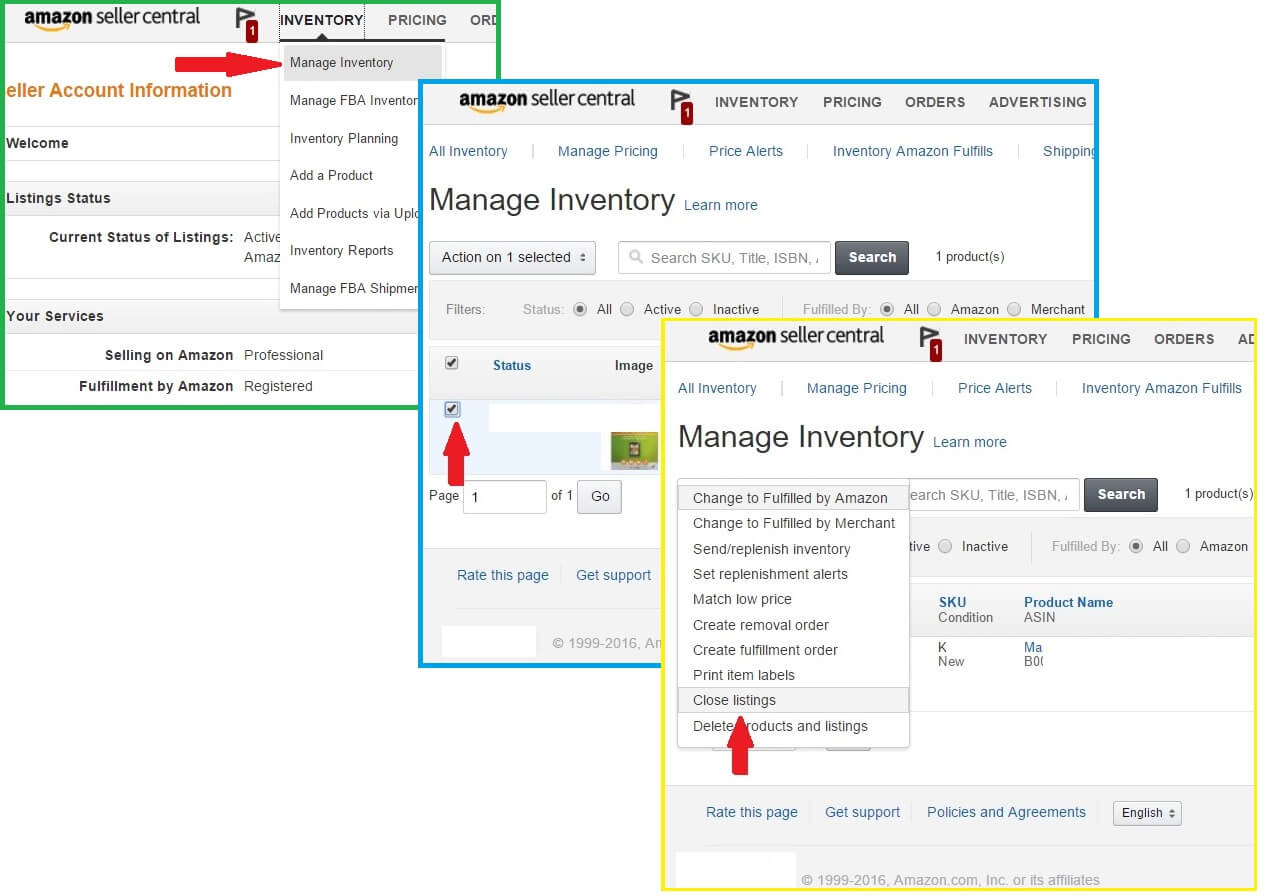
It can take up to 36 hours for all of your listings to be removed from the website.
C. Delete Some of Your Amazon Listings
The Edit button to the right of the inventory table in Seller Central can come in handy when you want to make temporary or permanent changes to specific titles in your stock. Use the Delete feature to selectively take out listings for products you know you wouldn’t be able to source again.
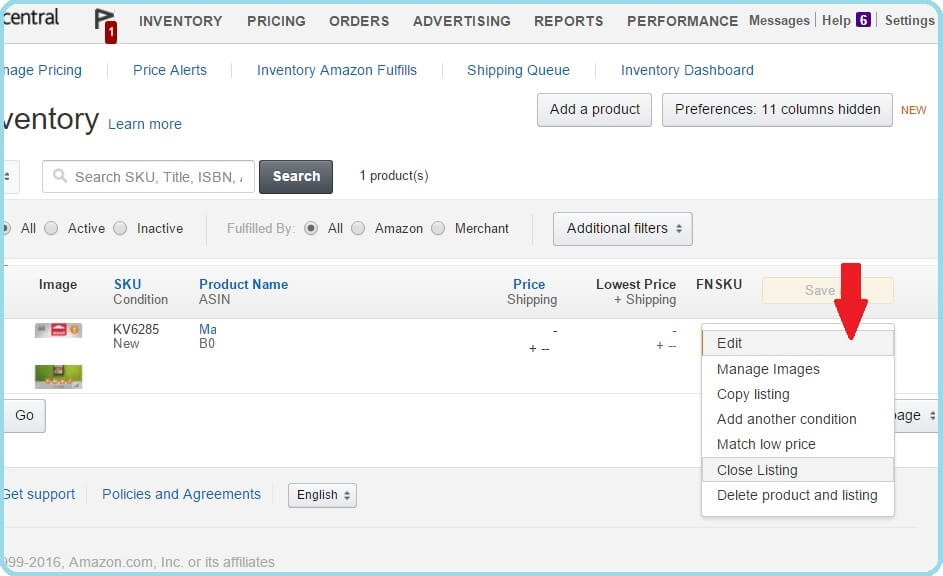
To edit your listings:
- Access your Inventory in Seller Central.
- Check the items you’d like to edit.
- Select the ‘Delete Product and Listing’ option in the drop-down ‘Edit’ menu to the right.
This change is permanent and irreversible.
D. Terminate your Amazon Account
Finally, once you’ve thought it over and decided that you don’t want to stay in business on Amazon, for whatever reason, you have the option to close your account.
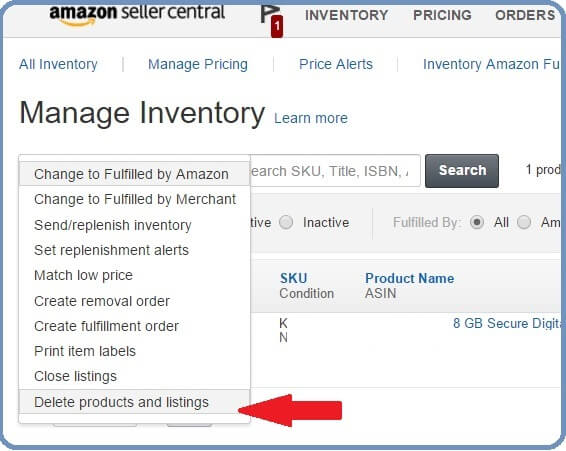
To delete all of your listings:
- Access your Inventory in Seller Central.
- Check the items you’d like to delete.
- Select ‘Delete Products and Listings’ from the drop-down ‘Action’ menu above.
This change is permanent and irreversible. An inventory purge will take a few days. The bigger the inventory, the more time it will take to delete everything.
At this point, you’re ready to move on to the next stage in closing the account.
This is what your to-do list should look like:
- Leave your affairs in order, including outstanding orders, A to Z claims and refunds;
- Request the return or disposal of your FBA stock, if any;
- Switch your selling plan from Professional to Individual to stop paying fees (they’re lower, but noticeable);
- Let 90 days go by from the time of your last order;
- Check the bank account on file so that your final payment can be processed;
- Make sure your account balance is 0;
- Send this form to Amazon (Seller Central login required).
Account termination is permanent and irreversible.
This concludes our list of basic steps and guidelines to use when editing, deleting or closing your listings. Please allow for some variation depending on the marketplace you operate on, and bear in mind that Seller Central layout and functionality may change in time.

Melanie takes an active interest in all things Amazon. She keeps an eye on the latest developments, and keeps Amazon sellers up to speed.