Ready to Get Started with Sellery?
This tutorial is your guide to quickly getting started with Sellery.
Note that when you first sign up if you’re very eager and log into your account right away, you may notice that your inventory has not yet populated. There’s nothing you need to do, this is an automatic process and depending on the size of your inventory it may take up to a few hours.
While you wait, feel free to use Playground mode. Playground mode is a sample inventory that you can use to explore pricing rules, smart lists and all of Sellery’s other features.
The Importance of Costs
Sellery keeps track of a lot of data for you. It imports all the information about listings from Amazon.
But one critical piece of data comes from you: your items’ costs. An item’s cost is used to calculate its minimum price. Minimum price is used as a default floor price in repricing to make sure that you’re not losing money. Other factors that are used to determine minimum price include estimated shipping fees and Amazon costs.
An accurate minimum price is required to make smart repricing decisions and it makes sure that you don’t lose money on sales.
There are a few ways to update costs.
You can edit the cost for an individual item in it’s stock tab, found under Inventory.
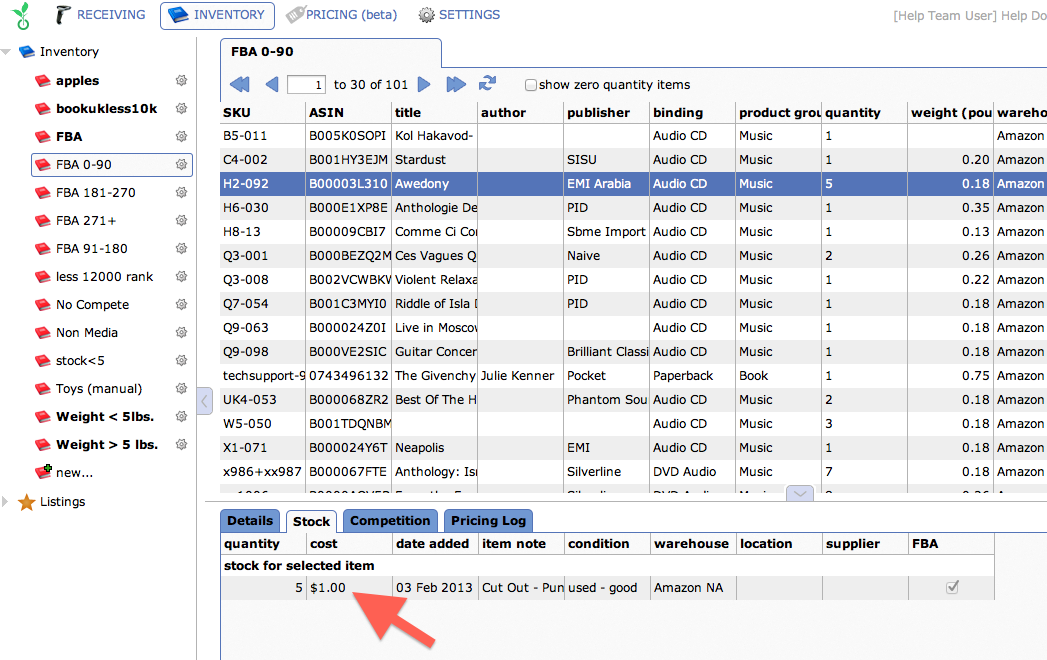
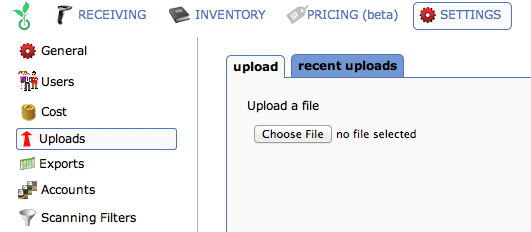
However, a faster way to update costs in bulk is to navigate to Settings and then Uploads. There, you can upload a file of all of your SKUs as well as the corresponding costs.
Here I have an Excel file with only two columns. One for my SKU and one with the corresponding cost.
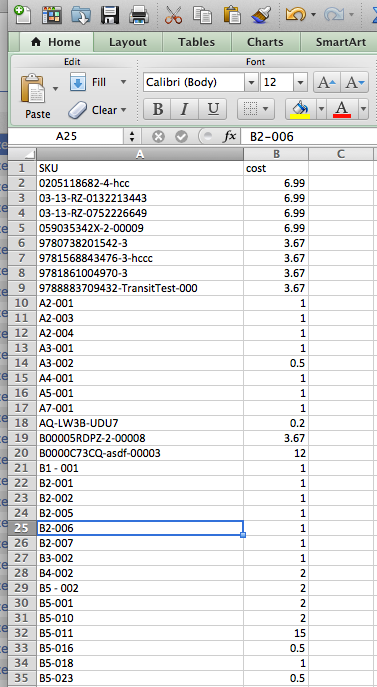
Create a file like this of your own and upload it. Then Sellery will have a cost associated with each item in your inventory.
Getting Started with Smart Lists
After updating costs, it’s time to start creating smart lists.
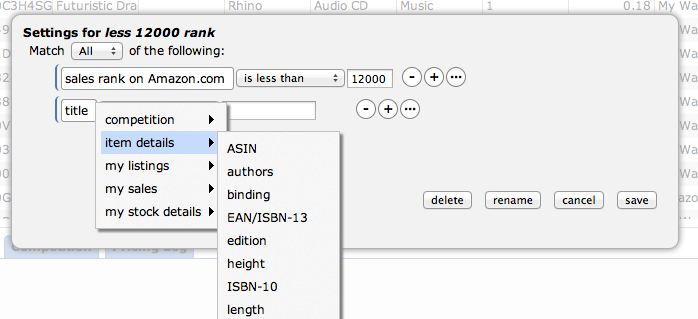
Smart lists are different views, or segments, of your inventory that you get to define.
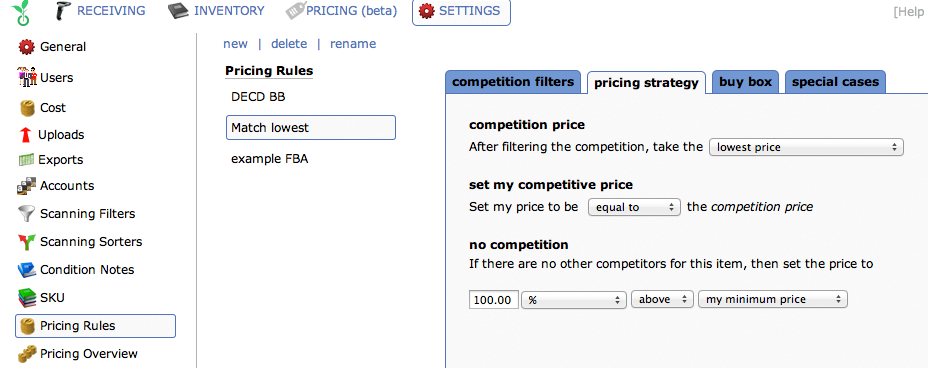
Moving on to Pricing Rules
After smart lists, you should look at pricing rules. Add as many or as few pricing rules as you need to reprice your inventory.
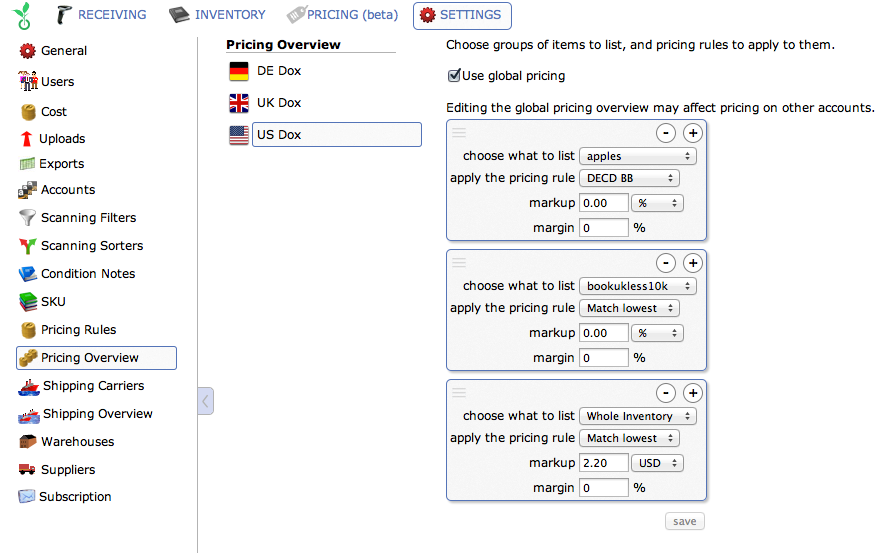
Put it all Together in the Pricing Overview
Now under the pricing overview we’re going to match up our smart lists, the segments of our inventory, with the appropriate pricing rule.
Going Live
Finally, we can go live with our pricing strategies and rules and allow Sellery to get to work. Simply choose the appropriate account and choose “Manage my listings on Amazon.”
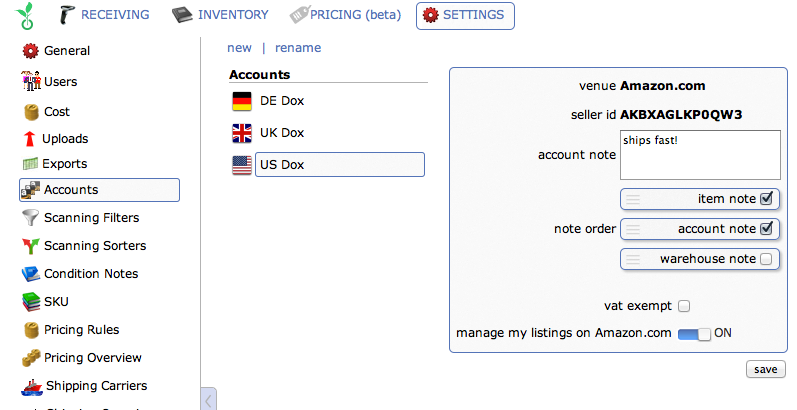
Note that you shouldn’t do this until you’re confident that your smart lists, repricing rules and pricing overview are set up exactly the way you want them.
Get in touch with the Sellery Help Team to make sure that everything is ready to go!
Or if you’re ready to get started repricing, sign up with Sellery today.


2 Responses
Hello from Spain
We could be interested on your services
I would like know if your software knows the quantity of stock, which has our competence, before lowering the price of an item.
If another seller has 1 unit of an item in Stock and the best price
And I have 100 units, I’m not interested in lowering the price of the item, I’m interested in the other seller selling it fast, so I can sell my 100 units at a higher price …
Hello Gabriel,
Thank you for your question.
For the time being, Sellery does not display that information. It’s something that has come up on several occasions and our tech team is aware of this request. Hopefully, we will implement it in the future.
If there’s anything else we may be of assistance with, please do not hesitate to contact us.
With best regards,
Oana
Sellery Help Team