All About File Exports
If you’re only using Sellery to reprice your inventory, you’re missing out on some key features.
This Sellery tutorial is about how to use custom file exports. Exports allow you to create a file of any or all of your inventory that contains information about those inventory items. If that sounds vague, that’s only because exports are incredibly customizable.
Let’s start by navigating to Settings in Sellery and finding Exports on the left-hand side.

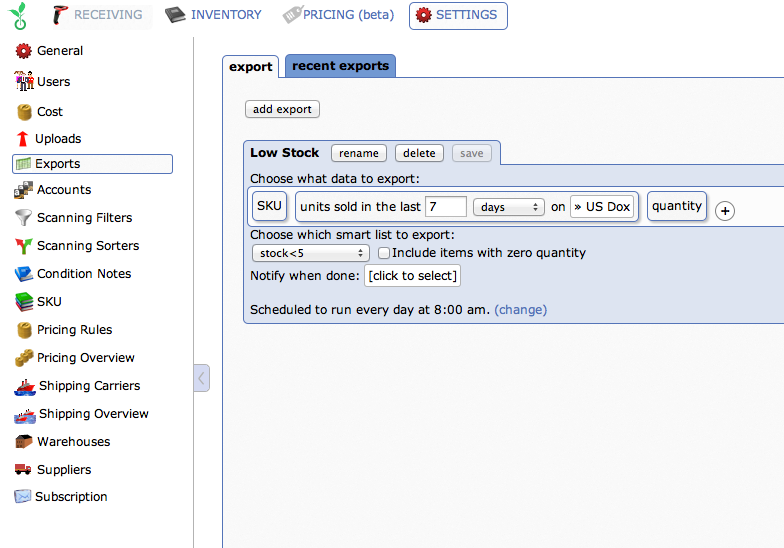
When you first visit Exports, all you’ll see is an option to “add export.” Let’s create an export together. I want to see my sales in the last 7 days — the actual number of items sold in that particular amount of time, so I’m going to name my export
After adding an export, you can choose what data you want to see in this file. By default Sellery includes only your SKU. If I didn’t want to see SKU in this file, I can hover over it and click the minus that pops up to delete it.
By clicking the Plus, I can now add whatever details I do want to see. Each piece of data you add will show up as a column in the final exported file.
Once you’ve added all the data you want, you can click and drag these labels around. By doing so you are configuring what the exported file is going to look like. Once you open it in Excel (or another spreadsheet editing program), this is the order of the columns that you’ll see.
And now I can choose which smart list to export, or my whole inventory.
Now you have a few options. You can click Export Now and in just a minute you’ll be able to download the results of the export.
You’ll be taken to the Recent Exports tab for download. There you can also download older exports.
You can also can set exports up to run automatically on a schedule and you can change the frequency of how often you want this export to be produced. The export we just made can be run weekly, since it is sales in the last 7 days. So you can run it every Sunday at 12AM.
If I have multiple accounts set up in Sellery, I can notify specific users when an export is completed. Check the box to any or all names and each user will receive an email with a link to download the export when it is completed.
Check out this article for more ideas on how you can use custom file exports in Sellery.
Start using Sellery and start repricing smarter.